
Essential Information for all SOB’s and Guests
Waiver Required
Anyone who rides with our club on any ride agrees to abide by our liability waiver (click to download and review). A new rider may ride one ride with the group as an unpaid guest AFTER ACCEPTING AND SIGNING THE WAIVER. To Accept the Waiver and/or to join, please click this link and follow the instructions. You must submit the waiver before you ride. You can pay the fee at a later time. We thank you for your cooperation with the policy.
PLEASE DO NOT RIDE WITH THE GROUP IF YOU FEEL ANY SYMPTOMS THAT COULD BE SIGNS OF A COLD, FLU, RSV, or COVID INFECTION. THANK YOU FOR BEING COURTEOUS TO YOUR FELLOW SOBS.
The Basics
- Helmets Are Required
- We obey all traffic laws, ride single file as far to the right as is safe, and use hand signals
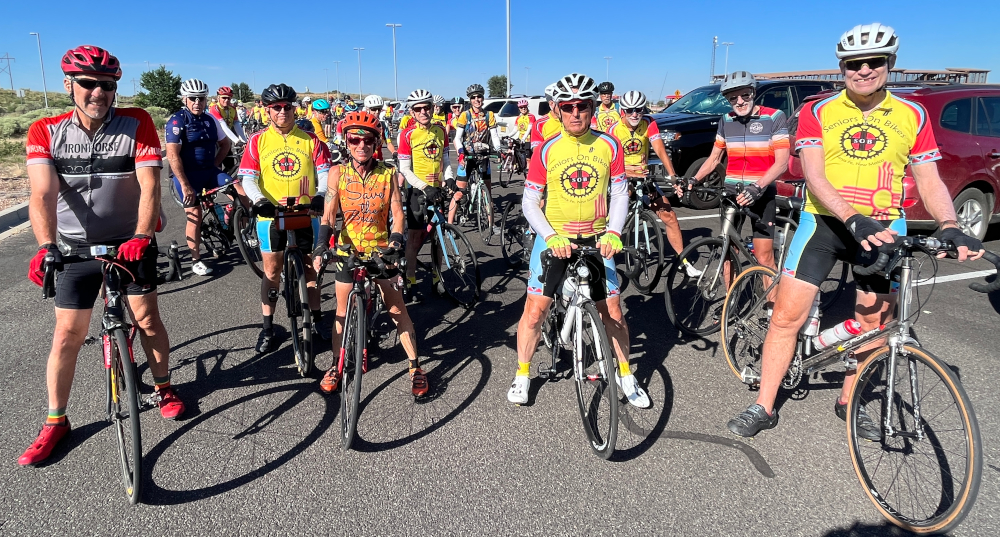
- Membership is open to any cyclist 50 years old or older. Guests of any age are welcome.
- Treat all of our Ride Leaders and HEROs respectfully and listen to their instructions. Ride Leaders and HEROs volunteer their time, energy, and passion to plan and lead safe and fun rides.
- Treat your fellow riders with courtesy and respect. You are personally responsible for your conduct and decisions on an SOB ride.
- To find the next ride, click this link. We start pedaling at the indicated time. Arrive 15 min in advance to get ready.
Safety
The following items explain how to ride safely and what is expected of each rider on an SOB ride.
- Helmets are required.
- Obey All Traffic Laws of the State of NM. We ride as vehicles.
- Ride with lights:
- We strongly recommend front blinking lights, rear blinking lights and use of rear view mirrors.
- Primarily Ride Single File as far right as possible:
- Allow breaks in a large group for cars to pull in.
- On a wide shoulder, it is OK to ride 2 abreast when safe and only when not blocking overtaking vehicles.
- Riding two abreast limits maneuverability, ride accordingly. The left-most rider must slow, accelerate, or move over to allow the adjacent rider to maneuver around debris or obstacles.
- The furthest left rider must pull right into single file when “car back” is announced. Other riders should adjust pace to allow rider in.
- Group riding is not pace lining. See Pace Line Protocol further down on this page. Pace Lines are primarily used by the A / Energetic group.
- Pass on the left, when clear of traffic:
- Passing on the right is discouraged. If you have room, and it is safer than passing on the left, then announce that you are “on the right”.
- Stopping/Waiting:
- Make sure you and your bike are completely out of traffic lanes when stopped.
- Hand Signals:
- Primarily use hand signals to indicate hazards, turns, stopping and slowing. You cannot over signal.
- Do not solely rely on hand signals from the front rider. Pass signals back through the group.
- Hazards include holes, bumps, cattle guards, road kill, gravel, sand, pedestrians, cars, etc., basically anything disruptive to a cyclist.
- Verbal Warnings:
- Verbal warnings should be used in extreme cases or when you cannot signal.
- Call out examples are “glass”, “hole”, “trash”.
- Call out “car up” – to warn of approaching vehicles.
- Call out “car back” – to warn of overtaking vehicles.
- On busy roads where there is constant traffic up and back then you do not need to announce every “car up” or “car back”.
- Announce “on your left” when overtaking an unsuspecting cyclist. You should expect to be passed if you are in the group but you are slowing for whatever reason. In this case “on your left” is not necessary.
- Verbal warnings should be used in extreme cases or when you cannot signal.
- Keep your head up and your eyes scanning:
- Do not fixate on the bike in front of you.
- Use your peripheral vision to monitor the bike in front of yours while you watch the road and riders ahead. You will better see the group slowing or accelerating, as well as traffic lights and stop signs..
- Rider responsibility:
- All riders are responsible for group safety.
- Everyone (not just ride leaders) has the obligation to request that riders adhere to these guidelines and to ask them to leave the group if they continually refuse.
- Strava Junkies Take Note!
- Safety First – it is more important to ride safely than to beat your segment time!
- When pulling a paceline or leading a group: Remember you are riding not just for yourself but for all the riders behind you. You have to think ahead so that the last rider in the line will be safe. Your average ride time is not as important as everyone behind you finishing the ride safely.
Essential Items for Riding with us
- Helmet – You will not be allowed to ride without a helmet.
- Signed SOB Liability Waiver.
- Rear blinky light, Front blinky light strongly recommended.
- Emergency contact name and phone number including medical insurance numbers on a business card or 3×5 or RoadID bracelet.
- Water bottle(s). Longer rides require 2 bottles.
- Spare tube(s)
- Tire iron(s)
- Hand pump or CO2 cartridge(s) with inflator head
- Small multi-tool recommended
- Small pen knife or tweezers recommended
Your bicycle should be in good repair and you should know how to fix a flat. If you are a beginner, please tell us at the start of a ride so that we can make sure that you are accompanied by one or more riders on your first ride so that you become comfortable with our group and our culture.
Types of Rides
We have two types of rides. Planned and Free Form or Ad Hoc. Planned rides occur every Thursday from April through October. Free Form (Ad Hoc) rides are every Tuesday and Saturday all year long, plus, from November through March there is a Free Form ride every Thursday as well. There may also be free form rides offered by one or more club members for other riders to join.
Planned rides have a specific route which is listed on this website at least a month, or more, in advance of the ride.
Free Form rides have no pre-planned route. The group meets at the place and time indicated, and agrees by consensus on a route with re-groups on a step by step basis.
All Rides are led by a ride leader and all riders are expected to ride safely and in accordance with applicable traffic laws. We also ask all riders to be courteous of other riders and other vehicles. Riders who endanger themselvers and/or others will be asked to leave the ride group.
The club self-selects into 3 main groups based on distance and speed:
A Group (Energetic): Usually rides 30 to 50 miles at a pace determined by the riders. The ride leader will stop for regrouping as dictated by the route and to make sure no one gets lost or dropped. Riders may ride faster or slower than the ride leader but regroup at the designated stop. For this group, riders are encouraged to be able to change flats and do simple bike repairs, but we will help each other. There can be an A- group on Thursdays during the ride season, which will ride slightly slower, sometimes with a separate leader.
B Group (Relaxed): Usually rides 20 to 40 miles at a pace determined by the ride leader. This is a “no-drop” group, that is riders will not be left behind. A designated rider, we call our HERO will ride at the back of the group to insure that no one is left behind. The HERO will also help with flats or simple mechanical problems. There can be a B+ and/or B- subdivision.
C Group (Relaxed): Rides around 20 miles at a speed that depends on the riders. This will also be a “no-drop” group.
Ride Leaders will decide: regroup points, HERO’s, and route changes for planned rides if conditions dictate.
e-bike Policy
E-bikes and riders are welcomed to ride with the Santa Fe Seniors on Bikes cycling club with the following stipulations.
1. E-bikes must be used in power assist mode only. This mode only provides power when the rider is pedaling. A rider with an e-bike that has both pedal assist and pedal free function will be allowed to ride if they use only the pedal assist function.
2. A power on demand bike such as a moped or motorcycle is not allowed unless it is being used as a support vehicle.
3. All riders are encouraged to take a bicycle safety class such as the League of American Bicyclist Smart Cycling courses especially if they are not familiar or used to riding a bicycle in an organized group.
4. New e-bike riders should ordinarily ride in the back of the pack. An exception is made when climbing a long hill and the e-bike rider is permitted to ride to and in the front of the pack. Experienced e-bike riders may ride anywhere in the group, unless the ride leader has requested otherwise.
5. If you feel that an e-bike is being operated unsafely, politely mention this to the rider, and advise the ride leader of your concerns.
Joining Our Group
If this sounds like a group you would like to take part in, please follow the instructions here. If you would like to contact us, please use this link and submit your question or comment using the form on the left side of the page. This website is our means of communication…those signed up will receive regular e-mail messages. To sign up and get the latest updates automatically, click this link, on the right side of the page you will see an e-mail address box. Add your email address to the box and you will then receive an e-mail each time a new blog entry is added. We do not sign you up for blog emails. This must be done manually by you.
SOB Pacline Protocol
Paceline riding:
- Definition: A line of riders who alternate turns riding at the front, pulling then resting by sitting in, drafting in the slipstream of the other riders.
- The benefit of a paceline is to allow faster speeds with reduced effort.
- Think of paceline riding as team riding. It requires cooperation and a lot more than just keeping up.
- It calls for focused attention, taking responsibility and leading / pulling.
When and when not to ride a paceline:
- Some roads and/or conditions suggest creating a paceline. Roads with little traffic that are flat to slight up or down work well.
- Busy roads with lots of overtaking traffic make it very difficult for lead rider rotation, making the paceline hard to manage.
- Steep hills, either up or down, provide little to no benefit from the paceline. A rapid descent in a paceline can be dangerous.
- Break up the paceline on steep hills.
- As terrain changes favoring a paceline, regroup and re-establish the paceline.
SOB Paceline Principals
- Ride tight to the right − pull off to your left.
- Depending on the road and the traffic, pacelines longer than 6 riders should be broken up into 2 separate groups to allow cars to pull in when passing.
- Ride in a smooth straight line:
- Maintain a steady predictable pace.
- Pedal through small bumps in the road − do not swerve around them.
- To adjust your gap:
- Smoothly and gradually increase your effort to close a gap, don’t sprint.
- Jumping to close a gap and then slowing down creates a yo-yo effect that adversely affects the entire group. Ride smoothly; ride predictably.
- Do not swerve or brake without warning, the bike behind will run right up your rear wheel.
- Slip left or right out of the slipstream to slow using air pressure.
- And / Or lightly feather your brakes (while continuing to lightly pedal so you are ready to close).
- Keep your head up and your eyes scanning:
- Do not fixate on the wheel in front of you.
- Use your peripheral vision to monitor the wheel in front of yours while you watch the road and riders ahead. You will better see the paceline slowing or accelerating, as well as traffic lights and stop signs.
- Do not overlap the rear wheel of the bike in front of you:
- If your front wheel touches the rear wheel of the bike in front of you, you risk crashing and taking down riders behind you. The cyclist in front may not feel a thing − they always win in this situation.
- If you are overlapped with the rider in front, that rider will not expect that you are there, and then he / she cannot safely slide out to the left for whatever reason.
- Do not ride adjacent to the paceline unless you are dropping back.
- Be either in front of the paceline; in the paceline or at the rear.
- Keep a safety space with the rider ahead of you:
- Unless you’re experienced riding a paceline and riding with cyclists you know and trust, there’s no need to ride just inches from the wheel you’re following.
- Allowing a gap of 1 to 2 wheel lengths gives you room to maneuver in case of mishaps or obstacles in the road.
- When at the front:
- Safety First! It is more important to ride safely than to beat your strava time or achieve an arbitrary average speed.
- Pedal smoothly.
- Speed will change with up hills and down hills; the effort you are expending should remain as constant as possible.
- You will need to keep pedaling on the down hills so that the bikes in back of you do not have to brake in order to avoid riding up your rear wheel.
- When passing a cattle guard or other significant obstacle understand that the group will naturally slow behind you until through the obstacle, slow slightly to allow a rolling regroup, then resume pace when all are back on.
- You are the eyes of the paceline – Watch for hazards. Every rider in the paceline is depending on the front rider.
- Move the path of the paceline well clear of obstacles.
- Call out / signal obstacles as well as your intention to slow or stop. Not every single hole warrants a shout.
- Call out hazards, don’t call out little bumps. Ride through rough spots by rising slightly off your saddle and pedaling through.
- Stronger riders should pull longer, weaker riders should pull shorter. However, everyone who is taking advantage of the paceline should pull.
- Don’t take monster pulls!! There’s no reason to sit on the front for 10 minutes; you will exhaust yourself. Generally, give up the lead after 1-3 minutes or 0.3 to 1 mile and let other riders have some fun.
- When ready to pull off, check for traffic behind you then verbally warn or hand signal the paceline.
- Move left when clear of traffic still maintaining your speed.
- Once clear of the paceline, slide gently to the back of the line.
- Pull in behind the last bike.
- When taking the lead:
- Do not surge or pick up the overall effort.
- Accelerating makes the paceline ragged and wastes energy, as riders have to surge to close gaps.
- On similar terrain, when you take the lead, maintain the same speed as when drafting.
- As you take over you will naturally have to put out more effort. Finesse your effort in order to maintain a smooth transition as you take over.
- If you are tired, make your turn at the front shorter. No one has to prove anything at the front.
- Do not surge or pick up the overall effort.
- When in the paceline:
- Communicate to other cyclists.
- If the pace is too high (or someone has a mechanical) tell the rider in front of you to ask the leader to slow (or stop).
- Everyone should pass the message up the paceline to the leader.
- When at the back:
- Check behind periodically for approaching traffic and call out “car back!”
- Because no one is behind you to be disrupted by your actions, now’s the time to take a drink or grab a snack from your jersey pocket. “Snot rockets” only at the back!
- Uncomfortable with pacelining:
- If you are new to the group sit on the back.
- When the front rider pulls off and moves to the back of the group, move to the left so you are on their wheel and allow the pulling off front rider to move in behind the rider in front of you. Tell them what you are doing in advance.
- Only do this at the back of the group, as riders behind you may want to pull through and the rider moving to the back probably wants as much rest as possible.
- Some people don’t want to ride in a paceline. That is fine. Just ride ahead or behind the group. If riding ahead, announce you are going ahead so the paceline does not give chase.
- Aerobars:
- When you are at the front pulling, it is ok to use aerobars.
- Within the paceline, please do not use aerobars.
- Aero bars are less stable and hands are farther from the brakes presenting a danger to everyone.
- Riders unwilling to comply with these guidelines should self-select out of the pacelines.
- Get out of the saddle carefully:
- Push harder on the pedal to keep the bike’s movement constant and rise out of the saddle slowly and smoothly as you enter a power stroke on the pedals.
- Don’t jump out of the saddle; your bike will slide backward, possibly into the trailing rider.
- If a hill is so steep that you need to ride out of the saddle; it is probably too steep to maintain the paceline.
- Good group riding means working together as a team.
- When you join the paceline, you’ve made an implicit agreement and a promise to everyone else in the group.
- The agreement: You’ll work together, safely and steadily, to further the group’s goals.
- The promise: You know the basic rules of paceline riding and you’re alert and ready to ride together.
- We are a team.
- When you join the paceline, you’ve made an implicit agreement and a promise to everyone else in the group.
Types of Pacelines
There are four basic types of paceline riding formations (single, double, circular, and echelon), each with its own practical application. We use only the single paceline, as the others have very limited use to a group like ours (and cannot really be used safely on public roads).
Straight or Single Paceline (This is the SOB paceline formation)
 This is the most basic riding formation; all the other pacelines are variations of it. Simply put, this is one straight line of riders, each drafting closely behind the next. The rider at the front breaks the wind for a time, then eases off to the side and soft pedals until he can swing in at the back of the line. In the majority of training and racing situations, this is the most efficient way to ride in groups of two or more. The benefit of a paceline occurs with 2 or more riders. More than 6 riders makes paceline management difficult. Depending on the total number of riders in the group, we should split into two (or more) pacelines.